
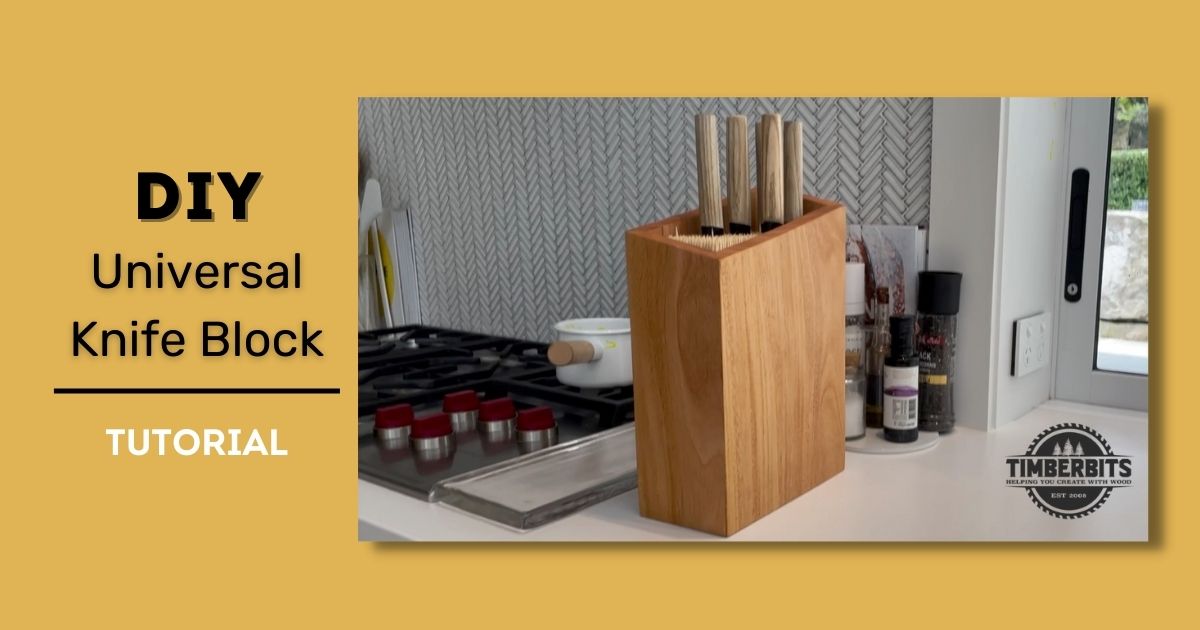
If you’re looking for your next DIY woodworking project, look no further than this universal knife block tutorial.
This clever design comes from the creative mind of Martin Robitsch, using bamboo skewers to fill a timber knife block.
This multiuse style accommodates any knife, allowing you to avoid the limitations of pre-set knife slots. (Also, making it the perfect gift!)
It’s an inexpensive, flexible, and elegant addition to any kitchen.
Follow our step-by-step instructions below to create your own!
What you need to make your own universal knife block
Before you get started, it’s important to note that there is some assumed knowledge for the tools we mention below.
But if you’re interested in brushing up on some of these skills — check out the Timberbits Woodworking School! And you can learn how with the help of our in-house experts.
If you’re ready to make it yourself — the project itself will take roughly four to five hours from start to finish.
Here’s what you’ll need to create your knife block:
Materials
- Solid wood — at least 770mm x 200mm x 40mm. Ideally, you’ll want to choose something to match the kitchen it is going into. But most timber will work.
- Bamboo Skewers (~2,000) — Get a large packet of 25cm length skewers.
- Wood glue — You’ll want something that withstands moisture and is approved for indirect food contact. We recommend the Titebond III Ultimate Wood Glue.
- Wood Oil — A food-safe mineral oil made for wooden food utensils will give you a natural and safe finish for raw timber. We recommend U-Beaut Foodsafe Plus.
Tools
- Festool KS120
- Jointer
- Thicknesser
- Table Saw
- Router Table
- Random Orbital Sander
- Bandsaw
Now that you’ve got your equipment sorted let’s dive into how to make your knife block from scratch.
How to make a universal knife block with bamboo skewers (step-by-step instructions)

Step 1. Start with a board over 770mm x 200mm x 40mm in size
See the plan below to view the dimensions we’ll work with.
(You can feel free to adjust as you like for the size you want.)

Step 2. Rough cut the boards
Cut the board in half. You’ll want to end up with two panels, each 380mm long.

Step 3. Mill the timber — Flatten one face and edge
Machine the boards on the jointer to get a flat face and an edge at 90 degrees.

Step 4. Thickness the other face
Dress the other flat face on the thicknesser to get another flat parallel face.

Step 5. Split board in half
Split each of your boards in half using the bandsaw. Ensure a flat edge on the bottom.
You will end up with four boards that are 380mm x 200mm x 19mm thick.

Step 6. Flatten sawn faces
Thickness all four boards down to 15mm thick using the thicknesser.
So you end up with four boards that are 380mm x 200mm x 15mm.

Step 7. Dock to final length
Using the drop saw or the table saw, dock the four boards to 350mm long.

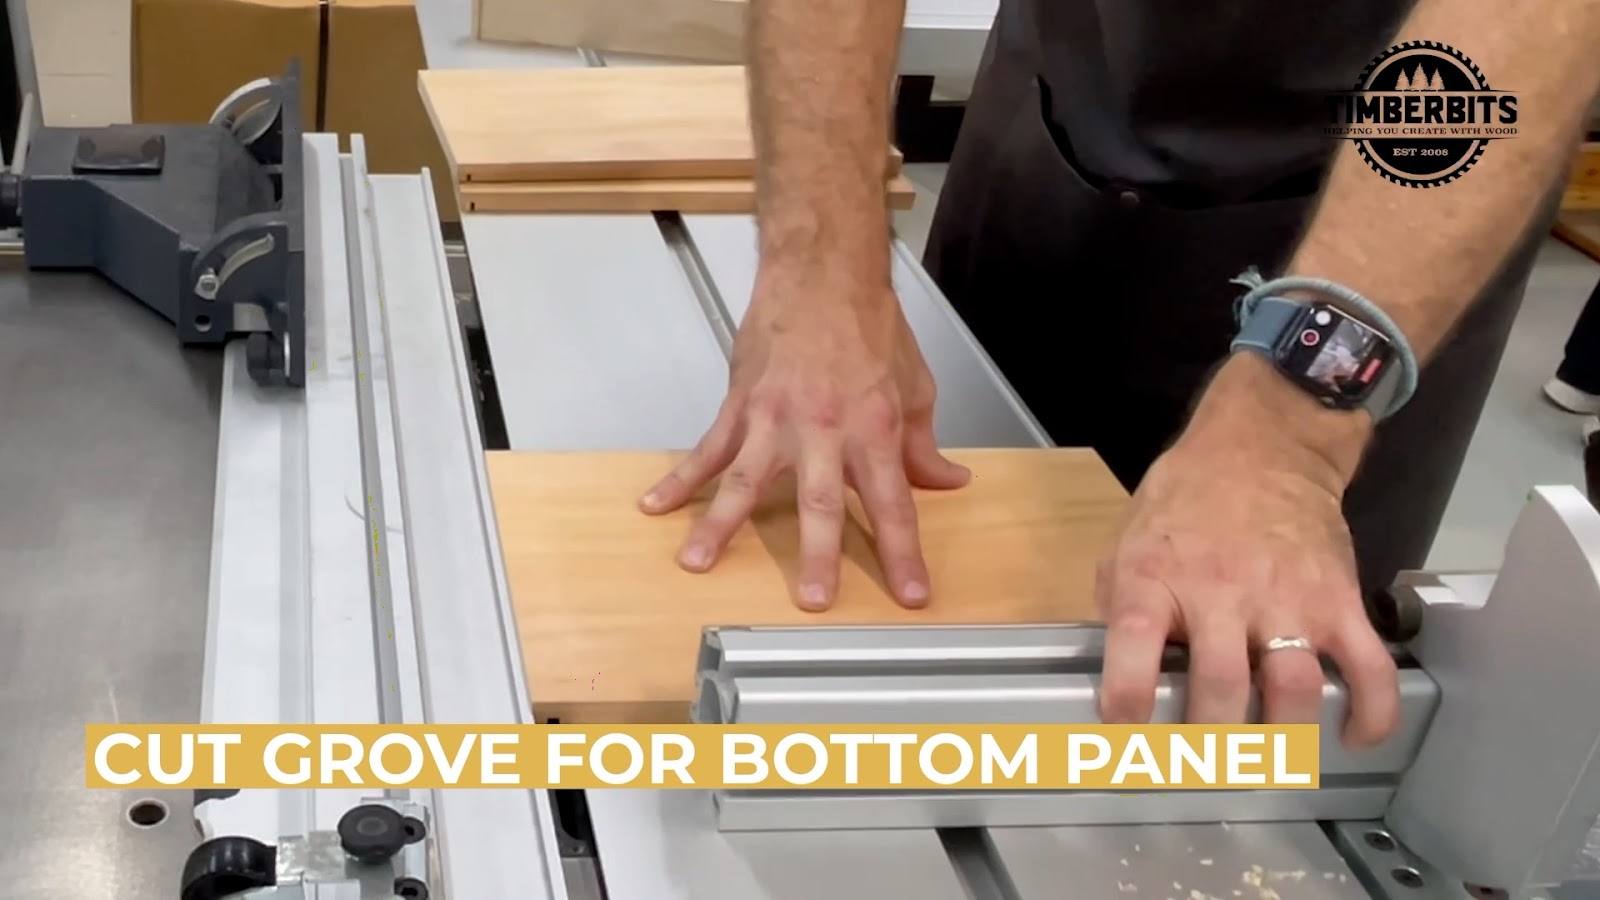
Step 8. Trenching
Using the table saw, adjust the height of the blade so that it cuts about 7mm high (you don’t need to be exact because we will make the bottom panel suit the size).
Note: You will need to remove the overhead guard on the blade because we are not making a through cut; instead, we are making a trench in the board.
Set the rip fence 8mm from the edge of the blade.
Using the Microjig Gipper push block, pushing down and forward, run the boards (outside face up) over the blade and along the fence to get a trench.
Repeat for all four boards.
The blade's kerf will give you a trench that is 3.175mm wide.
Step 9. Widen the trench
Move the rip fence 2mm to the right. And run the boards through the saw again to widen the trench.
This will give you a trench that is 5.175mm wide (you don’t need to be exact because we will make the bottom panel the correct thickness).
Step 10. Rip pieces to final width
Using the table saw, rip two boards down to 105mm wide (yes, only two boards!).
Do not cut all four boards down to 105mm wide.
The remaining two boards —rip to 195mm wide (or smaller just as long as the two widths are precisely the same).

Step 11. Rip 45-degree mitres
Set the fence on the table saw to 45 degrees. And rip the four boards at 45 degrees on both edges.

Step 12. Select a bottom panel
Measure the inside trench length of both the long and short boards.
This will give you the size of the board you will need to cut.
Select a bottom panel (minimum length of 300mm, so you can put it through the thicknesser).
Step 13. Dress the bottom panel
Dress the bottom panel on the face and edge using the jointer.
Step 14. Thickness the bottom panel
Machine the bottom panel down to the correct thickness to just fit into the trench.
Slowly reduce the thickness by 0.2mm at a time and check each time.
Step 15. Rip the bottom panel
Using the table saw, rip the bottom panel to the width of the short trench -4mm.
(If the width of the short trench is 98mm, rip the panel to 94mm).
Step 16. Dock the bottom panel
Using the drop saw or the table saw — dock the bottom panel to the width of the long trench -4mm.
Step 17. Sand interior faces
Sand the interior of the box and the bottom panel.

Step 18. Dry fit the box
To test-fit components without glue or fasteners, dry-fit the four sides and bottom panel and clamp together with three Bessey Band Clamps.
It is essential to dry-fit and clamp the box together before applying any glue.
Step 19. Glue the box together
We are using the three Bessey Band Clamps to glue the sides of the box together. The bottom panel is floating, so does not need to be glued in.
Remember: A good glue joint should have an even bead of squeezed-out glue along its length.

Step 20. Mark out the top
Mark 30mm from the top right-hand corner.
Draw a line from the top left-hand corner to the mark (30mm from the top right-hand corner).

Step 21. Set bandsaw to 10 degrees
Tilt the Bandsaw to 10 degrees. Then cut along the line to remove the top to get the facet.


Step 22. Sand all sides and finish with oil
Sand the box all over. And oil with your oil of choice (as this is for the kitchen, you'll want to make it a food-safe wood oil!)


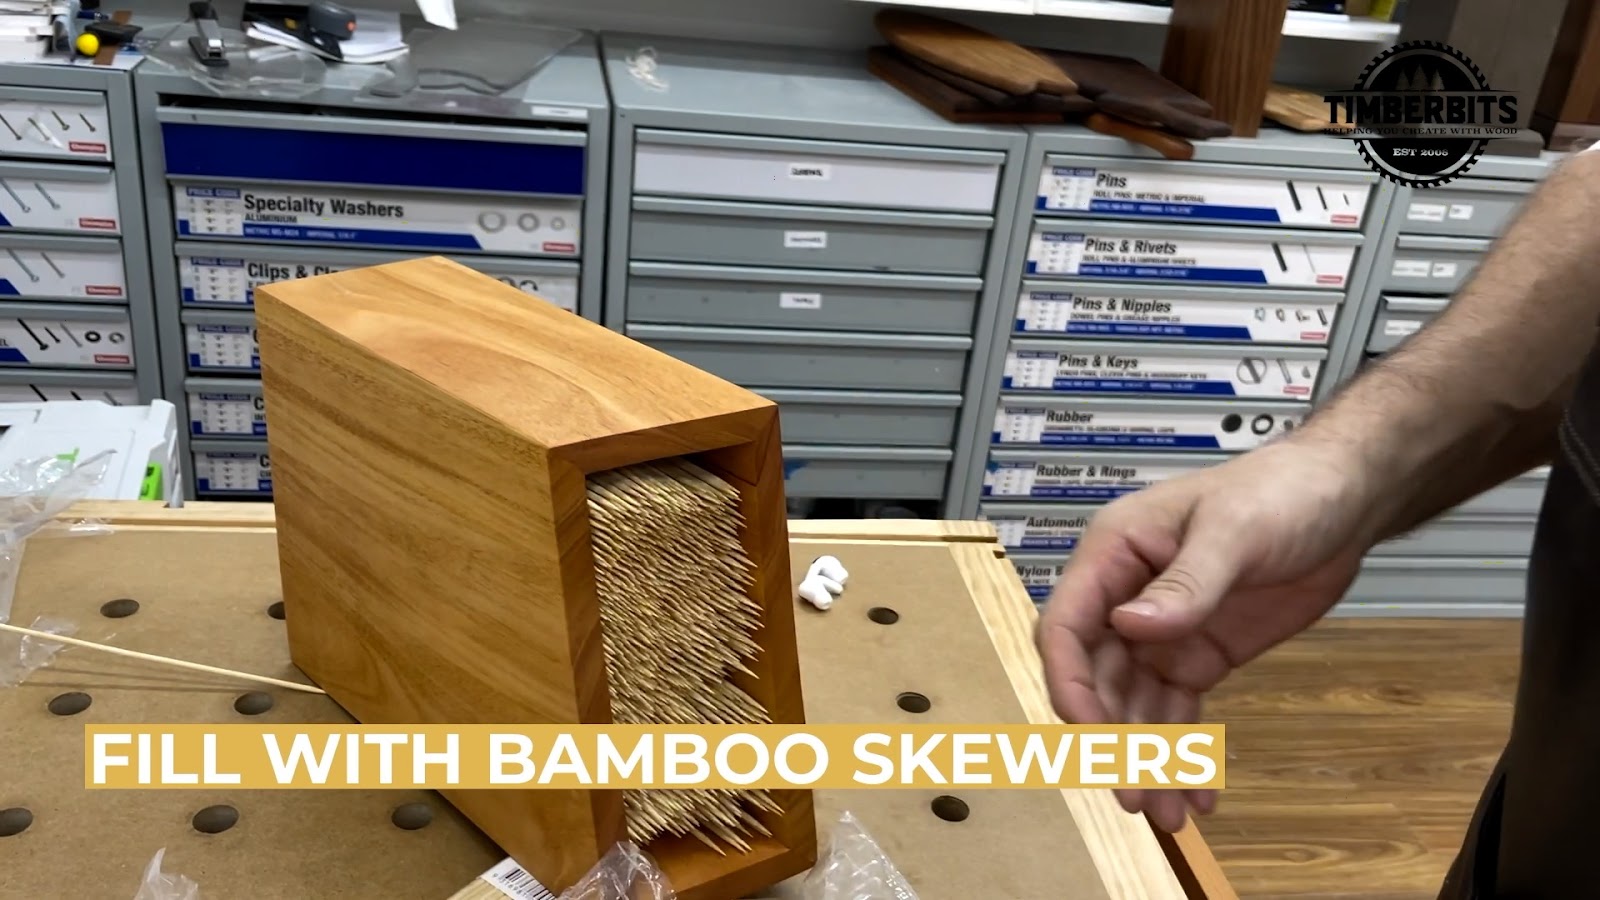
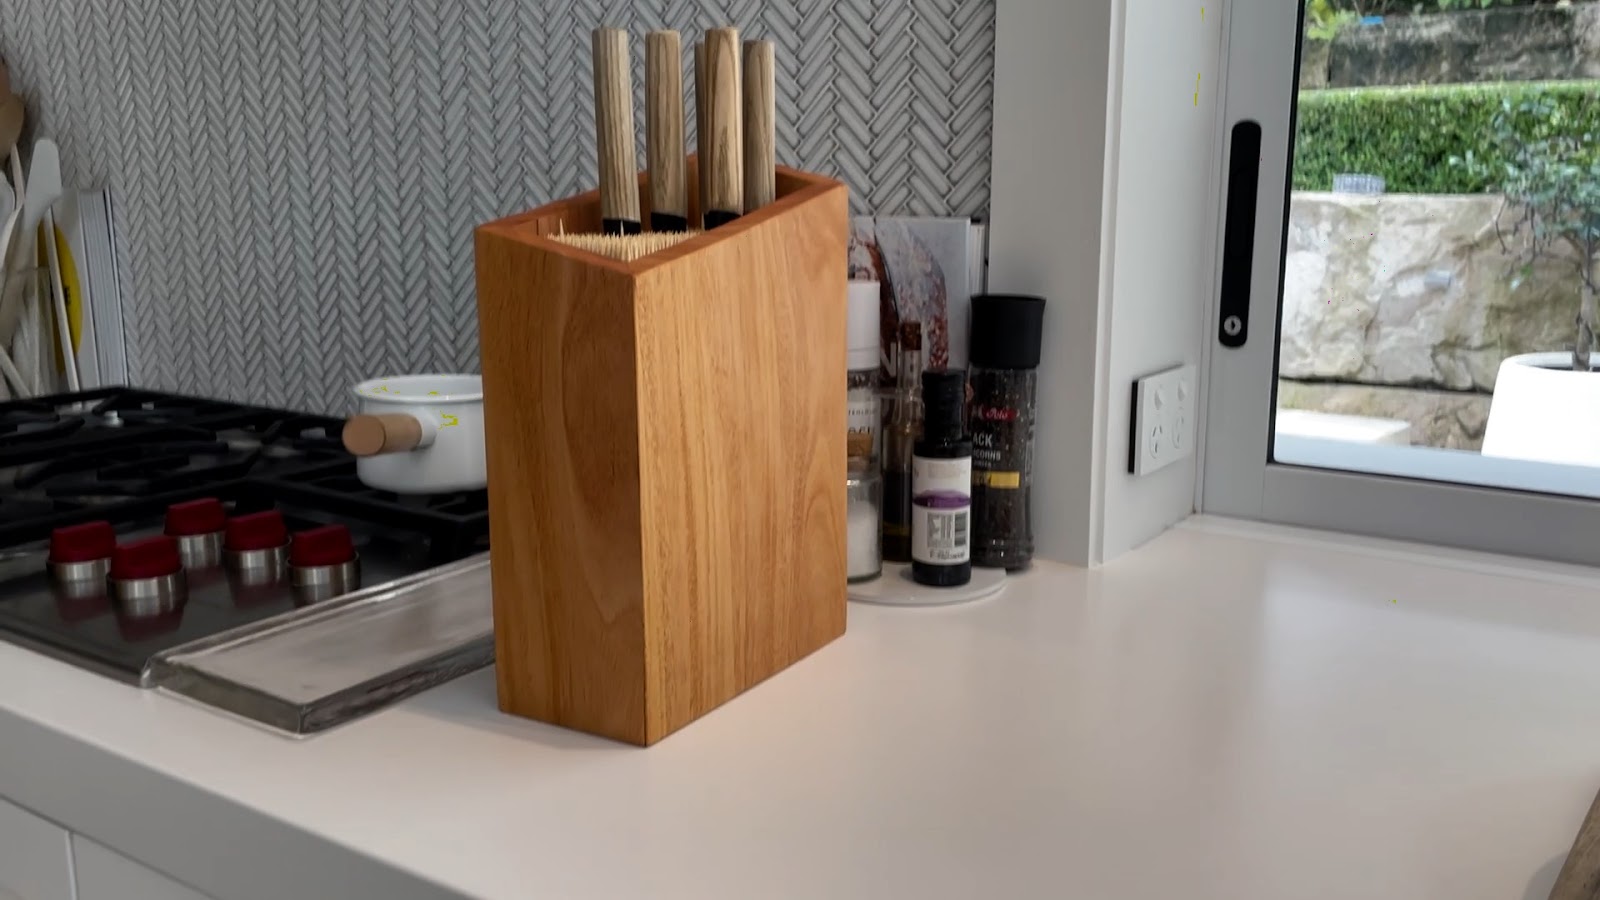
Step 23. Fill with bamboo skewers
Finally, add the bamboo skewers into your constructed box.
Ensure they are placed uniformly and parallel to the length of the box.
Then you can simply slide your knives in!

Watch how to make it
Minimise Mistakes! Four pressure points for the project to be aware of
We reached out to our resident expert, David, to discover what sticking points might arise as you create your knife block.
Four things you’ll want to pay careful attention to as you work through each step:
- Pay careful attention to make sure the mitres are accurately 45 degrees. This is the joint between your two pieces of wood.
- Ensure the opposite sides are exactly the same width.
- The bottom panel is floating — so it’s not glued to the sides of the knife block. Instead, it’s held in place by a sturdy frame.
- When sanding the sides, pay attention to sand down to the mitre joint and not past it.
That’s it for this DIY woodworking tutorial.
If you make your own universal knife block, send us photos of your work so we can share them with the community! We love to see your progress.
And if you’re interested in coming to any of our workshops — check out our woodworking and woodturning classes here.
Leave a comment